


How To Make Great Oboe Reeds In Less Time
-

-
 by Kathy Sheinhouse


Oboe Reed Making is challenging for most reed makers. It is time consuming, can be expensive (especially in the initial set-up), and has uncertain outcomes. But, it is an essential skill for advanced to expert players who want to be in control of their supply. Getting it right means you can play on reeds just the way you like them and you won't ever have to worry about the mail service doing its job when you have a concert in two days. Getting the results you want in less time will improve your life and "happiness quotient" as an oboist. Here are some strategies that have worked for me.
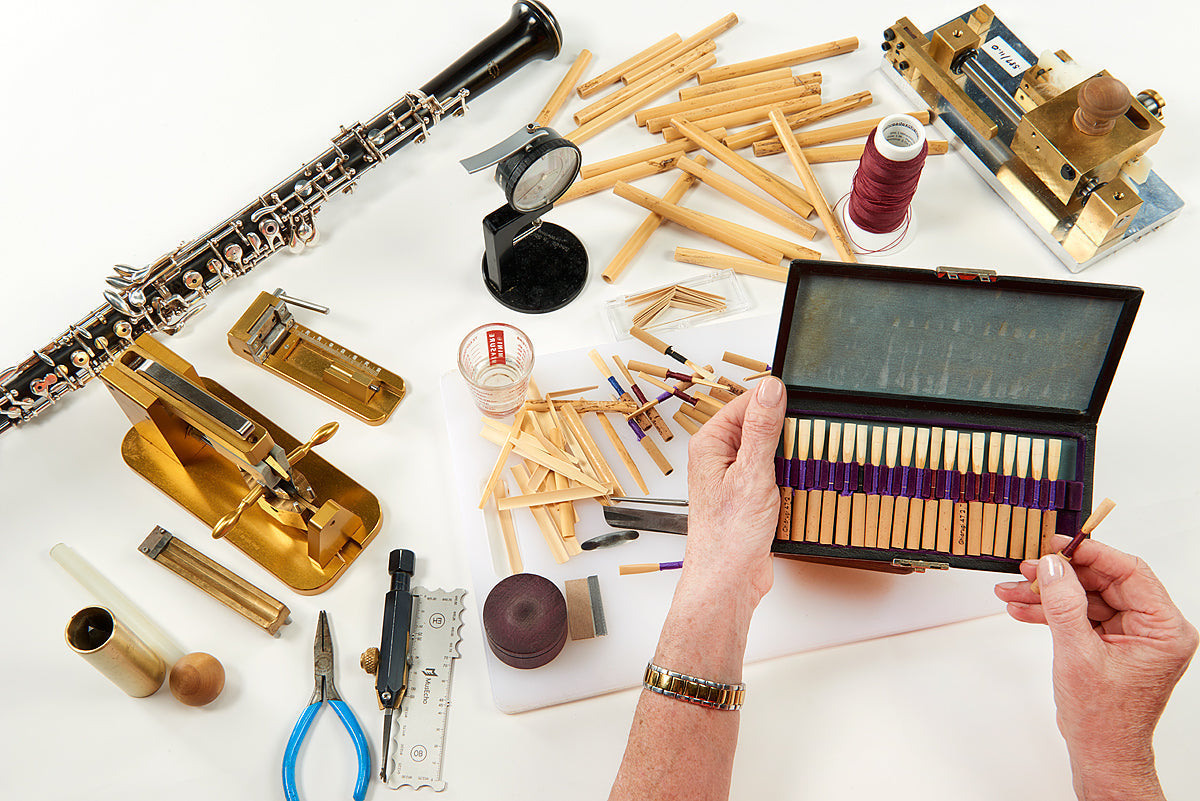
1) Use great cane. Make sure it is the right strength and diameter for your needs. Avoid cane sources that do not specify diameter, because all too often they will be out of spec with your preference range. If you process your own cane, sort by strength and diameter, and adjust your Gouger thickness accordingly. Don’t bother with truly soft cane. However, consider using relatively softer cane from your inventory during summer and harder cane during winter. Check for cracks in the cane before you start and throughout the process. Dismantle and start over if necessary.
2) Make sure your knife is sharp, but not so sharp that you are likely to make nicks in the cane or take off corners. Remember you can always reduce thickness, but you cannot replace lost thickness except through reconstruction of the reed- which is difficult at best.
3) Manage your pipeline of oboe-reed-blanks and lightly profiled reeds so they are always on hand, and you never have to rush through the finish. For a serious player requiring 12 or more reeds per month, this means that you must invest in at least 30 slips of gouged or gouged and shaped slips of cane at a time, and have 10 staples on the ready. Staples are reusable and can last years so don’t worry too much about the start-up costs.
4) Plan for two finishing cycles, except in an emergency. Cane needs to settle, and if you finish without a rest period, you are missing an opportunity to see how it will behave after drying. For players with gougers, never go from to gouge to finish in one session- this is a recipe for disaster every time.
5) Be mindful of dimensions. Stick to your tie length and clip length to ensure consistency. Try to make the clip length close to your finished length so you don't have to keep thinning a clipping the tip (I learned this lesson the hard way at Oberlin- and it took two hours to make a reed that I ended up wrecking in the end because my clipped length was too long). However, flexibility in service of the result is just as important. Talk to a trusted reed making advisor about their approaches to common problems that could make flexibility important when finishing the reed.
6) Preparing the reed for finishing should become routine. The real nuance is in testing and adjusting the reed during finishing. Know your target thicknesses at each stage of your reed making process. Use equal numbers of strokes with equal pressure during the pre-finish part of the cycle. Symmetry is important in reed making. Dial micrometers are helpful. I don't know too many people who can guess a millimeter or two difference with accuracy, and millimeters make a difference in reed making.
7) Slow down during the finish. Tips are hair thin and fragile at this stage. Test often. Do not over scrape. Use reed maps to help you if necessary. Work out a strategy with your oboe teacher to address any of the issues you have in testing. If you would like me to send you a copy of the reed map I use, please e-mail me at info@magicreed.com.
8) Think about what you are trying to accomplish in the time you have allotted for reed making. If you don't have a lot of time to make the reed, you are better off preparing it in steps for the next reed making session.
These are things I think about as a professional reed maker. I have learned certain efficiencies, and have certain muscle memory to produce a good reed faster than most. But make no mistake, I ruin my share too- everybody does- so don't feel bad. Happy reed making.
Shop Now


